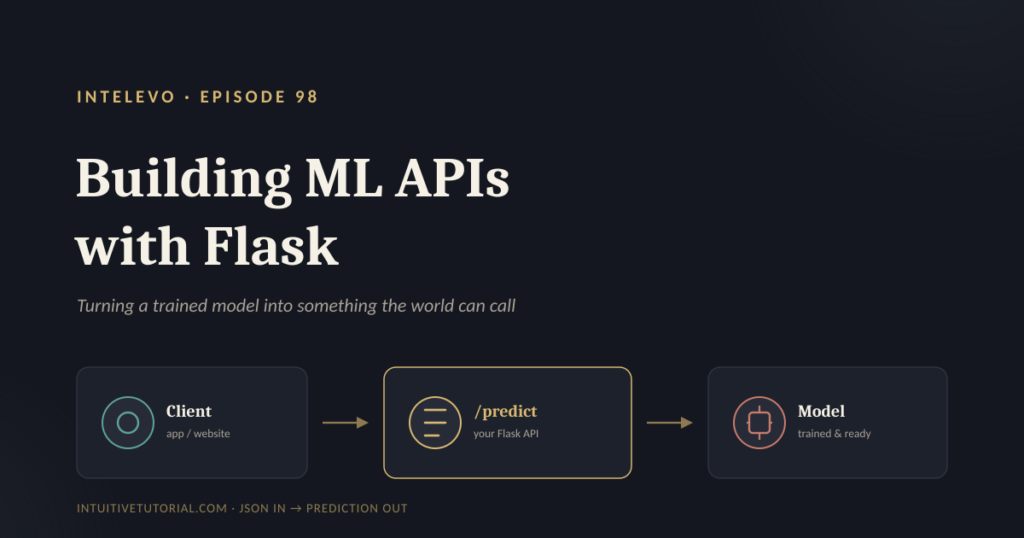
You trained a model. It works well in your notebook. But now what? Nobody outside your laptop can use it yet. This is exactly where building ML APIs with Flask comes in, and this guide walks you through the entire process, step by step.
By the end of this article, you will understand how a trained model becomes a live web service. You will see real Python code. You will also learn the mistakes to avoid before you ship anything to production. Let’s get started.
Why Bother Building an API at All?
A model sitting inside a Jupyter notebook only helps the person who wrote it. That’s a problem. Your teammates cannot use it. Also, Your website cannot use it. Your mobile app cannot use it either.
An API solves this instantly. It wraps your model in a small web service. Once that service is running, any application on the planet can send it data and get a prediction back. It doesn’t matter if that application runs on Python, JavaScript, or something else entirely. As a result, your model finally becomes usable outside your own machine.
This is precisely why building ML APIs with Flask is such a valuable skill for any data scientist. It closes the gap between “a model that works” and “a model people can actually use.”
The Restaurant Analogy: Understanding APIs Without the Jargon
Technical definitions can feel confusing at first. So, let’s use a simple picture instead: a restaurant.
Imagine you walk into a restaurant and order a dish. You don’t walk into the kitchen or you need to know the recipe. You just want your food, and you trust the process to deliver it.
A waiter takes your order. This waiter is the only person moving between you and the kitchen. They carry your request in, and they carry the finished dish back out. You never interact with the kitchen directly.
Meanwhile, the chef already knows the recipe by heart. Given an order, the chef simply cooks it and hands the dish to the waiter. That’s the whole scene, and surprisingly, it maps perfectly onto how ML APIs work.
- You are the client — an app, a website, or a phone.
- The waiter is the API, or more specifically, the endpoint.
- The chef and kitchen represent your trained model.
- The finished dish is the response, sent back as JSON data.
Once you see the analogy, the terminology stops feeling intimidating. It’s simply a request going in, and a prediction coming back out.
Why Choose Flask for This Job?
Flask is a lightweight Python web framework. It gives you just enough structure to open your restaurant, and nothing more. Consequently, it’s one of the fastest ways to get a model online.
Here’s why Flask works so well for this specific job:
- Minimal boilerplate. You can build a working API in under fifteen lines of code.
- Pure Python. It sits directly on top of the ML script you already have.
- Huge community. Nearly every question you’ll ever hit has already been answered online.
- A gentle first step. It’s the natural bridge before you move to larger frameworks, such as FastAPI.
In short, Flask removes friction. You focus on your model, not on web development theory.
The Six-Step Anatomy of a Flask ML API
Before touching any code, it helps to see the full blueprint. Every Flask ML API, no matter how complex, follows these same six steps:
- Train and save the model. Fit it, then freeze it into a file.
- Create the Flask app. One line starts the entire service.
- Load the model once. This happens at startup, not on every request.
- Define the
/predictroute. One endpoint, one clear job. - Handle the incoming call. Read the JSON, then run the prediction.
- Return the result as JSON. Send the prediction back to whoever asked.
Once you memorize these six steps, you can wrap virtually any model this exact same way. Now, let’s build it for real.
Step One: Save the Trained Model
Before Flask can serve anything, your model needs to exist as a file on disk. This step uses a Python library called pickle.
import pickle
from sklearn.ensemble import RandomForestClassifier

model = RandomForestClassifier()
model.fit(X_train, y_train)

# save it to disk, just once
with open("model.pkl", "wb") as f:
    pickle.dump(model, f)
First, you import pickle alongside your chosen algorithm — here, a RandomForestClassifier. Next, you train the model on your data using model.fit(), exactly as you normally would.
Then comes the important part. You open a file called model.pkl in write-binary mode, and pickle.dump() freezes the entire trained model into that single file.
Why does this matter so much? Training a model can take real time — sometimes minutes, sometimes hours. Pickling means you pay that cost only once. After that, every future prediction simply loads the file and runs, without retraining anything.
Step Two: Build the Flask App
With the model saved, you can now build the actual web service. This is the piece that plays the role of the waiter.
from flask import Flask, request, jsonify
import pickle, numpy as np

app = Flask(__name__)
model = pickle.load(open("model.pkl", "rb"))

@app.route("/predict", methods=["POST"])
def predict():
    data = request.get_json()
    x = np.array(data["features"]).reshape(1, -1)
    pred = model.predict(x)
    return jsonify({"prediction": pred.tolist()})

if __name__ == "__main__":
    app.run(debug=True)
Let’s break this down piece by piece.
First, you import Flask, request, and jsonify, along with pickle and numpy. Then, you create your app with Flask(__name__). Right after that, you load your saved model using pickle.load(). Notice this line sits outside any function. Therefore, it only runs once, when the server starts — not on every single request.
Next comes the route decorator: @app.route("/predict", methods=["POST"]). This line tells Flask exactly what to do: whenever someone sends a POST request to /predict, run the function directly below it.
Inside that function, four things happen in order. First, request.get_json() grabs the incoming data. Second, the code converts the features into a NumPy array and reshapes it. Third, model.predict() runs the prediction, just like it did during training. Finally, jsonify() wraps the result into a valid JSON response and sends it back.
Last, app.run(debug=True) starts the server itself. And with that, your model is officially online.
Step Three: Talking to Your API
Your server is now running. So, let’s actually test it. You don’t need a fancy tool for this — a simple command called curl does the job perfectly.
The request:
curl -X POST http://127.0.0.1:5000/predict \
  -H "Content-Type: application/json" \
  -d '{"features": [5.1, 3.5, 1.4, 0.2]}'
The response:
{
  "prediction": [0]
}
Here’s what just happened. The client sent four numbers as a JSON list, wrapped inside a features key. Flask received that request, handed it to the model, and the model returned a predicted class — in this case, zero.
Notice something important: this exchange doesn’t care what sent the request. A browser could have sent it. A mobile app could have sent it. Another backend server could have sent it too. Every single one of them would get the exact same JSON reply back.
If typing commands into a terminal feels unfamiliar, don’t worry. Tools like Postman offer the same functionality through a visual interface. You fill in the address, paste your JSON body, and click send. Either way, the underlying idea stays identical: a request goes out, and a structured response comes back.
The One Concept Worth Memorizing
Forget complicated math for a moment. Every Flask ML API, at its core, follows one simple contract:
JSON in → model.predict() → JSON out.
That’s genuinely it. No matter how sophisticated your model is underneath, every request eventually collapses into that single line.
While you’re testing your API, you’ll also encounter HTTP status codes. These three matter the most:
- 200 OK — the prediction returned successfully.
- 400 Bad Request — the JSON you sent was missing or malformed.
- 500 Server Error — something broke inside your own model code.
Learning to recognize these three numbers will save you significant debugging time later on.
From a Working Script to a Real Product
Here’s where things get genuinely exciting. The moment /predict exists, your model stops being “a notebook” and instead becomes a service.
A website form can now call it directly. A mobile app can call it too. So can an internal dashboard, another backend service, a scheduled batch job, or even a teammate’s separate project. None of these callers need Python installed. None of them need your training code. They don’t even need to know which algorithm you used. They only need the address, and the shape of the JSON.
That single shift — from “code that works on my machine” to “a service anyone can call” — is the real skill you gain from building ML APIs with Flask.
Why This Approach Feels So Reliable
Several qualities make this pattern hold up well in real projects.
First, it’s decoupled. Your model’s logic lives apart from whoever consumes it. Consequently, you can update one side without breaking the other.
Second, it’s language-agnostic. Any client that can send a web request can use your model, regardless of the programming language behind it.
Third, it’s testable like any other API. Tools such as curl, Postman, or automated test suites all work exactly the same way they would for any other web service.
Finally, it’s ready to scale later. When you’re ready for production traffic, you simply swap Flask’s development server for a proper WSGI server. Your endpoint code doesn’t need to change at all.
Common Pitfalls to Avoid
Even simple systems have traps. Here are four mistakes almost everyone makes the first time, along with the fix for each one.
Reloading the model on every request. This slows your API down dramatically. Instead, load the model once, outside your route function, exactly as shown earlier.
Shipping with debug=True. This setting exposes an interactive debugger to the public internet, which creates a real security risk. Instead, deploy with a production WSGI server, such as gunicorn.
Trusting the incoming JSON blindly. Missing keys or unexpected data types will crash your endpoint immediately. Instead, validate the request before it ever touches your model.
Forgetting CORS. Browsers silently block requests coming from other domains unless you allow it explicitly. Instead, enable this deliberately using the flask-cors extension.
Avoiding these four issues alone will put your API ahead of most first attempts.
There’s a fifth trap worth naming too: skipping logging entirely. Without logs, a failed prediction becomes a mystery. So, add simple logging around your /predict function early. Later, when something breaks at 2 a.m., you’ll thank yourself for it.
Flask Today, FastAPI Tomorrow
Flask is an excellent starting point, but it isn’t the only option. As your traffic grows, or as your team grows, you may eventually want built-in request validation, automatic interactive documentation, and native support for asynchronous code. That’s exactly where FastAPI comes in.
For now, though, don’t skip ahead. Understanding Flask first gives you a rock-solid mental model. Every concept you learned today — routes, JSON payloads, status codes — carries forward directly into FastAPI. Nothing here gets wasted.
Quick Recap: It Really Is This Simple
Let’s strip away the terminology one more time. Only five moves remain:
- Train and save your model.
- Wrap it inside a small Flask app.
- Expose one clean
/predictroute. - Send JSON in, and get a prediction out.
- Test it — then it’s ready to deploy.
That’s the entire journey, from a script on your laptop to a live, callable service.
Final Thoughts
Building ML APIs with Flask doesn’t require heavy infrastructure knowledge or advanced web development skills. Instead, it requires six familiar steps, a little Python, and a clear mental picture — the restaurant, the waiter, and the kitchen.
Once your model sits behind an endpoint, it stops being something only you can use. It becomes something a website, an app, or a colleague can call directly, today, without asking you to run anything by hand. That’s a meaningful shift, and now you know exactly how to make it happen.
If you want to see this entire build happen on screen, along with the live testing walkthrough, check out the companion video on the Intelevo YouTube channel. And if you’re ready for the next step, the following episode moves from Flask to FastAPI — a faster, async-ready framework with automatic documentation built right in.