
In this post, we will see how to animate matplotlib graphs. In many situations you might wish to create an animated content of some dynamic graph or process. You might want to do this to explain or understand a concept better. It is especially appealing for people like me who cannot think in abstract terms. And the glad news is, it is super easy to create the same with Python. Let’s see how to do it. The process can be broken down into the following steps.
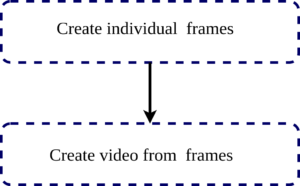
We will be using the open-source programming language Python and matplotlib library for this purpose. Here the individual frame creating can be easily done by saving the matplotlib file. We can add minute changes to the graph using a loop and save thereafter. The sample code will look like this.
#!/usr/bin/python
# -*- coding: utf-8 -*-
import matplotlib.pyplot as plt
import numpy as np

labelsize = 14
width = 8
height = 6

plt.rc('font', family='serif')
plt.rc('xtick', labelsize=labelsize)
plt.rc('ytick', labelsize=labelsize)
plt.rc('axes', labelsize=labelsize)

Fs = 8000
f = 5
sample = 8000

x = np.arange(sample)
for i in range(1, 200):
    (fig, ax) = plt.subplots()
    fig.set_size_inches(width, height)
    fig.subplots_adjust(left=.16, bottom=.18, right=.95, top=.97)
    y = np.sin(2 * np.pi * f * x / Fs - i / 20.0)
    plt.plot(x, y)
    plt.ylabel('voltage(V)')
    plt.xlabel('sample(n)')
    plt.savefig('Frame' + str(i) + '.png', dpi=600)
    plt.close()
This saves each frame with its count number as Frame#.png.
Animate Matplotlib Graphs
The final part is in stitching every frame into a single movie which can be easily done by the following Linux command.
ffmpeg -y -f image2 -r 1 -i Frame%d.png -pix_fmt yuv420p -r 25 MovieName.mp4
Here what we are doing essentially is to read all those individual images we are created in an ordinal order and stitch them together to create it into the form of a movie. This example shows how to combine them into a video. But it is also possible that we can create the output file into the formate of Graphics Interchange Format (GIF) image. This is often convenient if the output medium we are targetting need not be having an inbuilt video player. Moreover, almost all image browsers and internet browsers support GIF format. This ensures the delivery of our content without any additional installation or setup.
You can speed it up or slow it down according to your requirement with the following Linux command.
ffmpeg -i MovieName.mp4 -filter:v "setpts=0.1*PTS"MovieName_Fast.mp4
The example video created using this code is shown below.
Happy visualisation :-)))