Have you ever wondered what actually happens between “we have some data” and “there’s an app using AI”? That gap is the machine learning workflow. It is the real journey every ML project takes, and it is far simpler than it sounds.
In our last episode, we explored the three ways machines learn: supervised, unsupervised, and reinforcement learning. That episode answered how a machine learns. This one answers a bigger question. How does that learning turn into something real? How does it become a product you actually use?
By the end of this article, you will understand the full machine learning workflow. You will also see why it rarely works on the first try, and why that is completely normal. Let’s get started.
Why Every Machine Learning Project Needs a Workflow
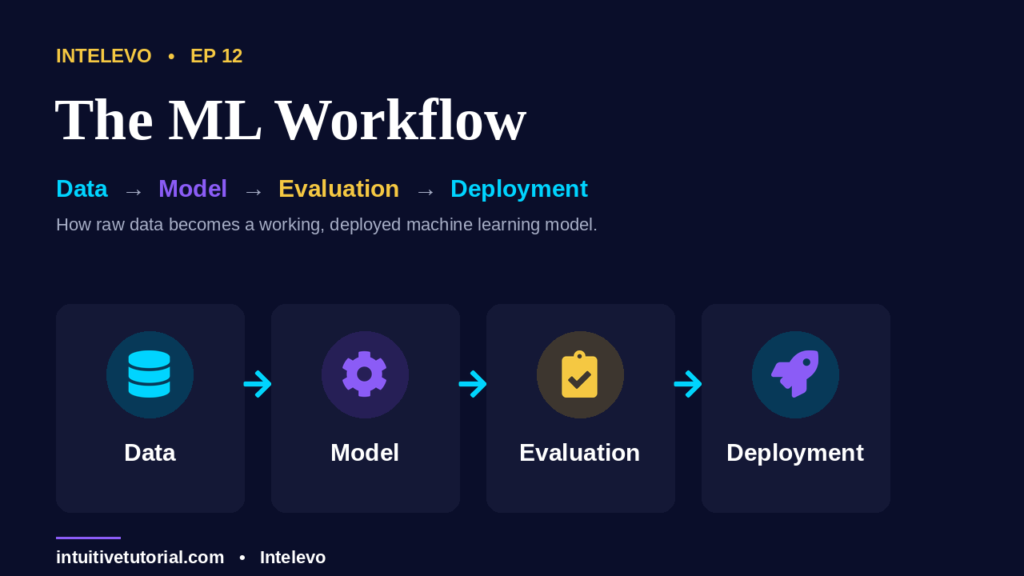
Here’s a simple truth. No one wakes up, writes one line of code, and ships a working AI model. Instead, every successful ML project follows the same four-stage path:
- Data – gather and clean the raw material
- Model – train it to find patterns
- Evaluation – test it honestly
- Deployment – put it to real use
This sequence holds true whether you’re building a spam filter, a price predictor, or a self-driving car. So, once you understand this workflow, you can understand almost any ML project you come across.
Notice something important here. None of these four stages is optional. Skip data cleaning, and your model learns the wrong lessons. Skip evaluation, and you have no idea whether your model actually works. Skip deployment, and your model never helps anyone. Each stage depends on the one before it, and each one sets up the one after it. That dependency is exactly what makes this a workflow, rather than just a list of unrelated steps.
The Machine Learning Workflow, Explained Like Cooking a Meal
Technical explanations often lose people in jargon. So, let’s use an analogy instead, one we will carry through this entire article.
Every machine learning project is really just like cooking a meal:
- You gather your ingredients. That’s your data.
- You follow, and perfect, a recipe. That’s your model.
- You taste-test before serving. That’s your evaluation.
- Finally, you serve the dish to your guests. That’s your deployment.
This analogy might sound playful, but it holds up surprisingly well. In fact, every mistake you can make while cooking has a direct parallel in machine learning. Bad ingredients ruin the dish. Bad data ruins the model. Skipping the taste test risks disappointing your guests. Skipping evaluation risks shipping a broken model. Keep this analogy in mind as we walk through each stage.
There’s another reason this analogy works so well. A recipe rarely turns out perfectly on the very first attempt. A good cook adjusts the salt, the heat, or the timing, and then tries again. Machine learning follows the exact same rhythm. You will see this clearly once we reach the iteration loop later in this article. For now, just remember the four words: gather, cook, taste, serve. Everything else in this workflow is a detailed look at one of those four moments.
Stage 1: Data — The Raw Ingredients
Every recipe starts with ingredients. Every machine learning model starts with data. So, this stage is where your project truly begins.
Here’s a simple truth about ML: garbage in means garbage out. If your data is messy, incomplete, or biased, no algorithm can fix that later. As a result, most experienced practitioners spend more time here than anywhere else in the entire workflow.
This stage typically breaks down into three steps:
- Collect – gather examples from the real world.
- Clean – fix errors, remove duplicates, and handle missing values.
- Prepare – format everything consistently, so the model can actually use it.
Here’s what this looks like in Python:
import pandas as pd

data = pd.read_csv("house_prices.csv")
data = data.dropna()  # removes rows with missing values
Notice how short this code is. That simplicity is intentional. The real skill in this stage isn’t clever code. It’s judgment: knowing what to keep, what to fix, and what to discard.
Common Data Mistakes to Avoid
Before moving forward, watch out for these frequent pitfalls. They quietly damage more machine learning projects than any algorithm choice ever does.
- Incomplete data. Missing values skew your model’s understanding of reality. Handle them deliberately, rather than ignoring them.
- Duplicate records. Repeated entries make your model overweight certain examples, which biases its final pattern.
- Inconsistent formatting. A date written three different ways confuses a model just as much as it confuses a human reader.
- Unrepresentative samples. If your data doesn’t reflect the real-world situation your model will face, your model won’t either.
So, before you train anything, pause here. Look closely at your data. This single habit prevents more failed ML projects than any other step in the entire workflow.
Why You Split Your Data Before Training
Before we move to training, there’s one more crucial step. You need to split your data.
Think about a student who only ever studies from the answer key. That student doesn’t really learn. Instead, they memorize. So, to test real learning, we hold some questions back.
We split our dataset into two parts:
- Training set (around 80%) – the study material. The model learns from this.
- Test set (around 20%) – the surprise exam. We hold this back to honestly check what the model actually learned.
In code, this split takes just one line:
from sklearn.model_selection import train_test_split

train, test = train_test_split(data, test_size=0.2)
Eighty percent to learn from, twenty percent kept secret. That’s how we set up an honest test later in the workflow.
Stage 2: Model — Finding the Recipe
Now we reach stage two: the model. This is the training step, and if you watched our previous episode, you already know this moment well. The machine studies the training set and works out the pattern connecting each question to its answer.
Whether the underlying method is supervised, unsupervised, or reinforcement learning, this is exactly where “learning” happens. In code, it looks deceptively simple:
model.fit(train_inputs, train_answers)
One line, but don’t let its simplicity fool you. Underneath that single call, the model runs through thousands of tiny trials and adjustments. It tries a pattern, checks how wrong it is, adjusts slightly, and repeats. Eventually, it converges on a pattern that fits the training data well.
So, training isn’t magic. It’s persistence, automated.
A Concrete Example of “Finding the Recipe”
Let’s make this more tangible. Imagine you’re training a model to predict house prices from size. Your training data might look like this:
sizes = [500, 750, 1000]     # square feet
prices = [50, 70, 90]        # in lakhs

model.fit(sizes, prices)
model.predict([850])
# → ₹82 lakhs (approx)
The model never saw an 850 square foot house before. Yet it estimated a reasonable price anyway, because it found the underlying relationship between size and price during training. That’s the entire purpose of stage two. The model isn’t memorizing examples. Instead, it’s learning a rule general enough to apply to new, unseen inputs.
Stage 3: Evaluation — The Taste Test
Before serving guests, a good chef tastes the dish. Before trusting a model, we test it the same way, on data it has never encountered before.
This is stage three: evaluation. And it might be the most important stage in the entire machine learning workflow, because it’s the only honest check on whether learning actually happened.
Here’s what evaluation looks like in code:
predictions = model.predict(test_inputs)
accuracy = model.score(test_inputs, test_answers)
# → 0.91 (91% correct on unseen data)
Now, here’s the golden rule worth remembering. Good performance on the training set means nothing on its own. Good performance on the test set means everything. Why? Because the training set is the answer key the model already saw. The test set reveals whether real learning happened, or whether the model simply memorized.
This distinction separates a genuinely useful model from an impressive-looking failure.
A Few Common Ways to Measure Success
Accuracy is the simplest evaluation metric, and it works well for many beginner projects. However, as you go further, you’ll encounter a few other useful measures:
- Precision – of everything the model flagged as positive, how much was actually correct?
- Recall – of everything that was truly positive, how much did the model actually catch?
- Error rate – on average, how far off are the model’s numeric predictions?
You don’t need to memorize formulas for these right now. Just remember the underlying idea. Every metric exists to answer one question honestly: did this model actually learn something useful, or did it just get lucky on the data it saw?
The Iteration Loop: Why It’s Rarely Right the First Time
Here’s something worth knowing before you build your first model. It’s rarely right on the first attempt, and that’s completely normal.
A chef doesn’t perfect the seasoning on the first try either. Instead, they taste, adjust, and taste again. Machine learning works the same way. After evaluation, if results aren’t good enough, we go back. We adjust the model, retrain it, and re-test it. We repeat this loop until performance is genuinely ready to serve.
This loop, not any single step, is what “building a machine learning model” really means in practice. So, if your first model underperforms, don’t panic. Iteration is the process working exactly as intended.
What does “adjusting” actually involve? Usually, it means one of a few things. Sometimes, you gather more data, because your model simply hasn’t seen enough examples yet. Sometimes, you clean your data further, because a hidden error was quietly confusing the model. Other times, you try a different algorithm entirely, or you fine-tune the settings of your current one. Each adjustment leads to another round of training and evaluation. Eventually, performance improves enough to move forward confidently.
Stage 4: Deployment — Serving the Dish
Finally, we reach stage four: deployment. A recipe means nothing until it reaches the table. Similarly, a trained model means nothing until it reaches real users.
Deployment puts your trained model to work inside an app, a website, or a service. From that point forward, it makes real predictions, for real people, in real time. Here’s a simplified example of what that looks like inside a live application:
# inside a live app
new_data = get_user_input()
result = model.predict(new_data)
show_to_user(result)
This is the exact moment machine learning stops being a notebook experiment. Instead, it becomes a real product, quietly running behind the scenes of an app or website.
Two Common Ways to Deploy a Model
Deployment isn’t a single approach. Broadly, it takes one of two forms:
- Real-time deployment – the model responds instantly, the moment a user takes an action. Voice assistants and fraud detection systems both work this way.
- Batch deployment – the model processes large groups of data on a schedule, such as overnight. Many recommendation systems update this way, once a day.
Either way, deployment isn’t the finish line. Once a model goes live, teams monitor it continuously. Real-world data shifts over time, and a model that performed well last year might quietly grow stale. So, deployment often loops right back into the workflow, starting the whole cycle again with fresh data.
The Machine Learning Workflow in Everyday Life
You’ve actually experienced this workflow many times already, often without realizing it. Consider these familiar examples:
- Online stores – your clicks become data. That data trains a taste model, gets evaluated against your past purchases, and gets deployed as “Recommended for you.”
- Self-driving cars – sensor data trains driving decisions. Engineers evaluate the model over millions of test miles before deploying it on real roads.
- Medical diagnosis tools – patient records train a detection model. Teams evaluate it against known cases before deploying it to assist doctors.
- Voice assistants – voice samples train speech models. Developers test them for accuracy before deploying them inside your phone.
Every single one of these products follows the same four-stage machine learning workflow. Data leads to a model. The model gets evaluated. Finally, it gets deployed. Once you notice this pattern, you start seeing it everywhere.
Quick Recap
Let’s bring it all together. The complete machine learning workflow has four stages:
- Data – collect and clean raw information. Remember: garbage in, garbage out.
- Model – train the system to find the underlying pattern. This is where learning truly happens.
- Evaluation – test on unseen data. This step is your honesty check.
- Deployment – put the model to real use. This is where machine learning finally becomes real.
And between evaluation and deployment, remember the iteration loop. Most models pass through this loop several times before they’re ready to serve.
Frequently Asked Questions About the Machine Learning Workflow
Do I need to be a math expert to follow this workflow? Not at all. This entire workflow relies more on judgment and process than on advanced math. You can understand and even practice every stage with basic Python knowledge.
How long does one pass through the workflow usually take? It depends entirely on your project. A simple prototype might take a single afternoon. A production system, however, often takes weeks, mostly because of the iteration loop between evaluation and deployment.
Which stage do beginners underestimate the most? Almost always, it’s the data stage. New practitioners want to jump straight to training a model. Experienced practitioners know that clean, well-prepared data quietly determines most of the final result.
Can I skip evaluation if my model looks good during training? No, and this is worth repeating. Training performance tells you almost nothing on its own. Only evaluation, on unseen data, reveals whether your model actually generalizes to the real world.
What’s Next: Linear Algebra Essentials
Now that you understand the machine learning workflow, we’re ready to go one level deeper. Our next episode covers Linear Algebra Essentials: vectors, matrices, and dot products.
This might sound intimidating, but don’t worry. It’s simply the math language every ML model secretly speaks underneath the surface. We’ll explain it without the fear, and with almost no complicated formulas.
Watch the Full Episode
This article accompanies our YouTube episode, “EP12: The ML Workflow: Data to Model to Evaluation to Deployment,” on the Intelevo channel. If you found this explanation useful, watch the full video for a visual walkthrough of every stage, complete with diagrams and live code demos.
While you’re there, consider subscribing to Intelevo. New episodes walk through machine learning and AI concepts in plain language, one topic at a time. And if you have questions about the machine learning workflow, drop them in the comments. We would love to hear from you.